Welcome to Deskbuddy Setup
To get started with Deskbuddy, first connect your power cable. The smaller (USB-C) end connects to the Deskbuddy, and the larger (USB) connection can either plug into your computer or be connected to a power supply.
Note: Connecting to your computer will ensure that future updates to the Deskbuddy can be installed automatically. If you don't connect to your computer as standard, you may need to do so from time to time, to ensure that your Deskbuddy is fully up to date.
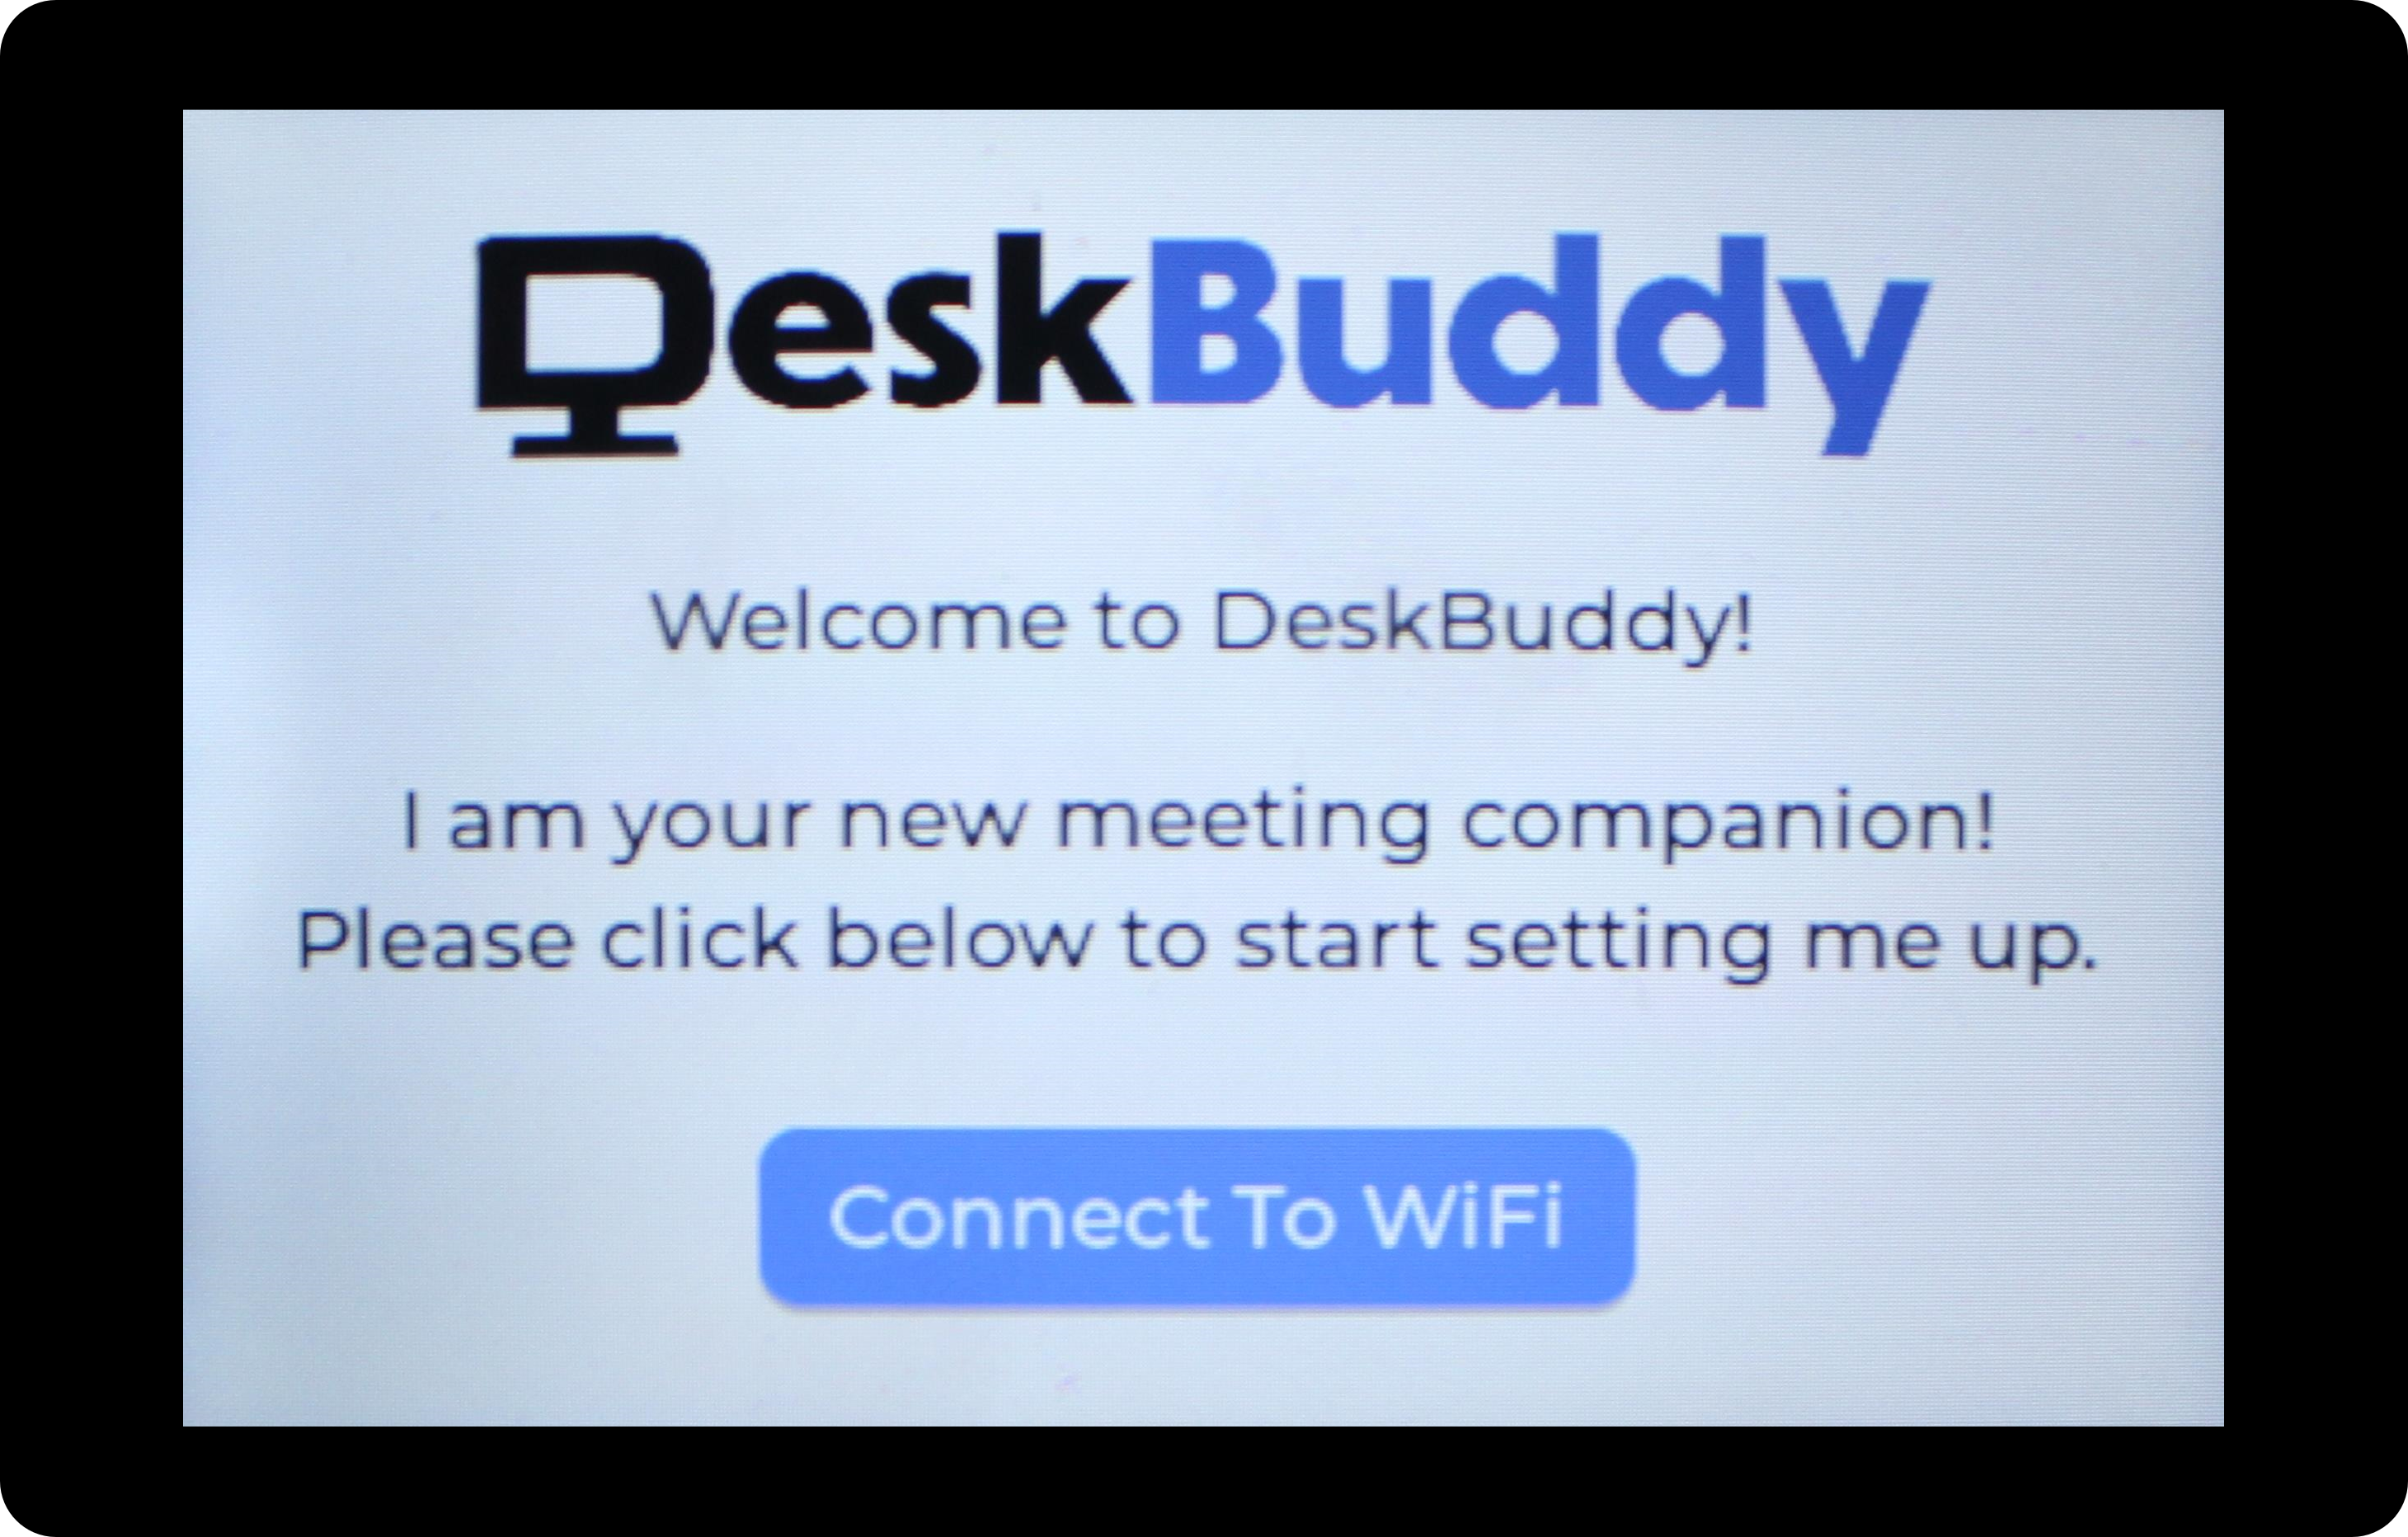
Once your Deskbuddy is powered up, all you need to do is set up the WiFi and configure the calendars.
WiFi Setup
Tap the 'Connect To WiFi' button on your Deskbuddy screen.
Select your WiFi network:

Enter your WiFi password:
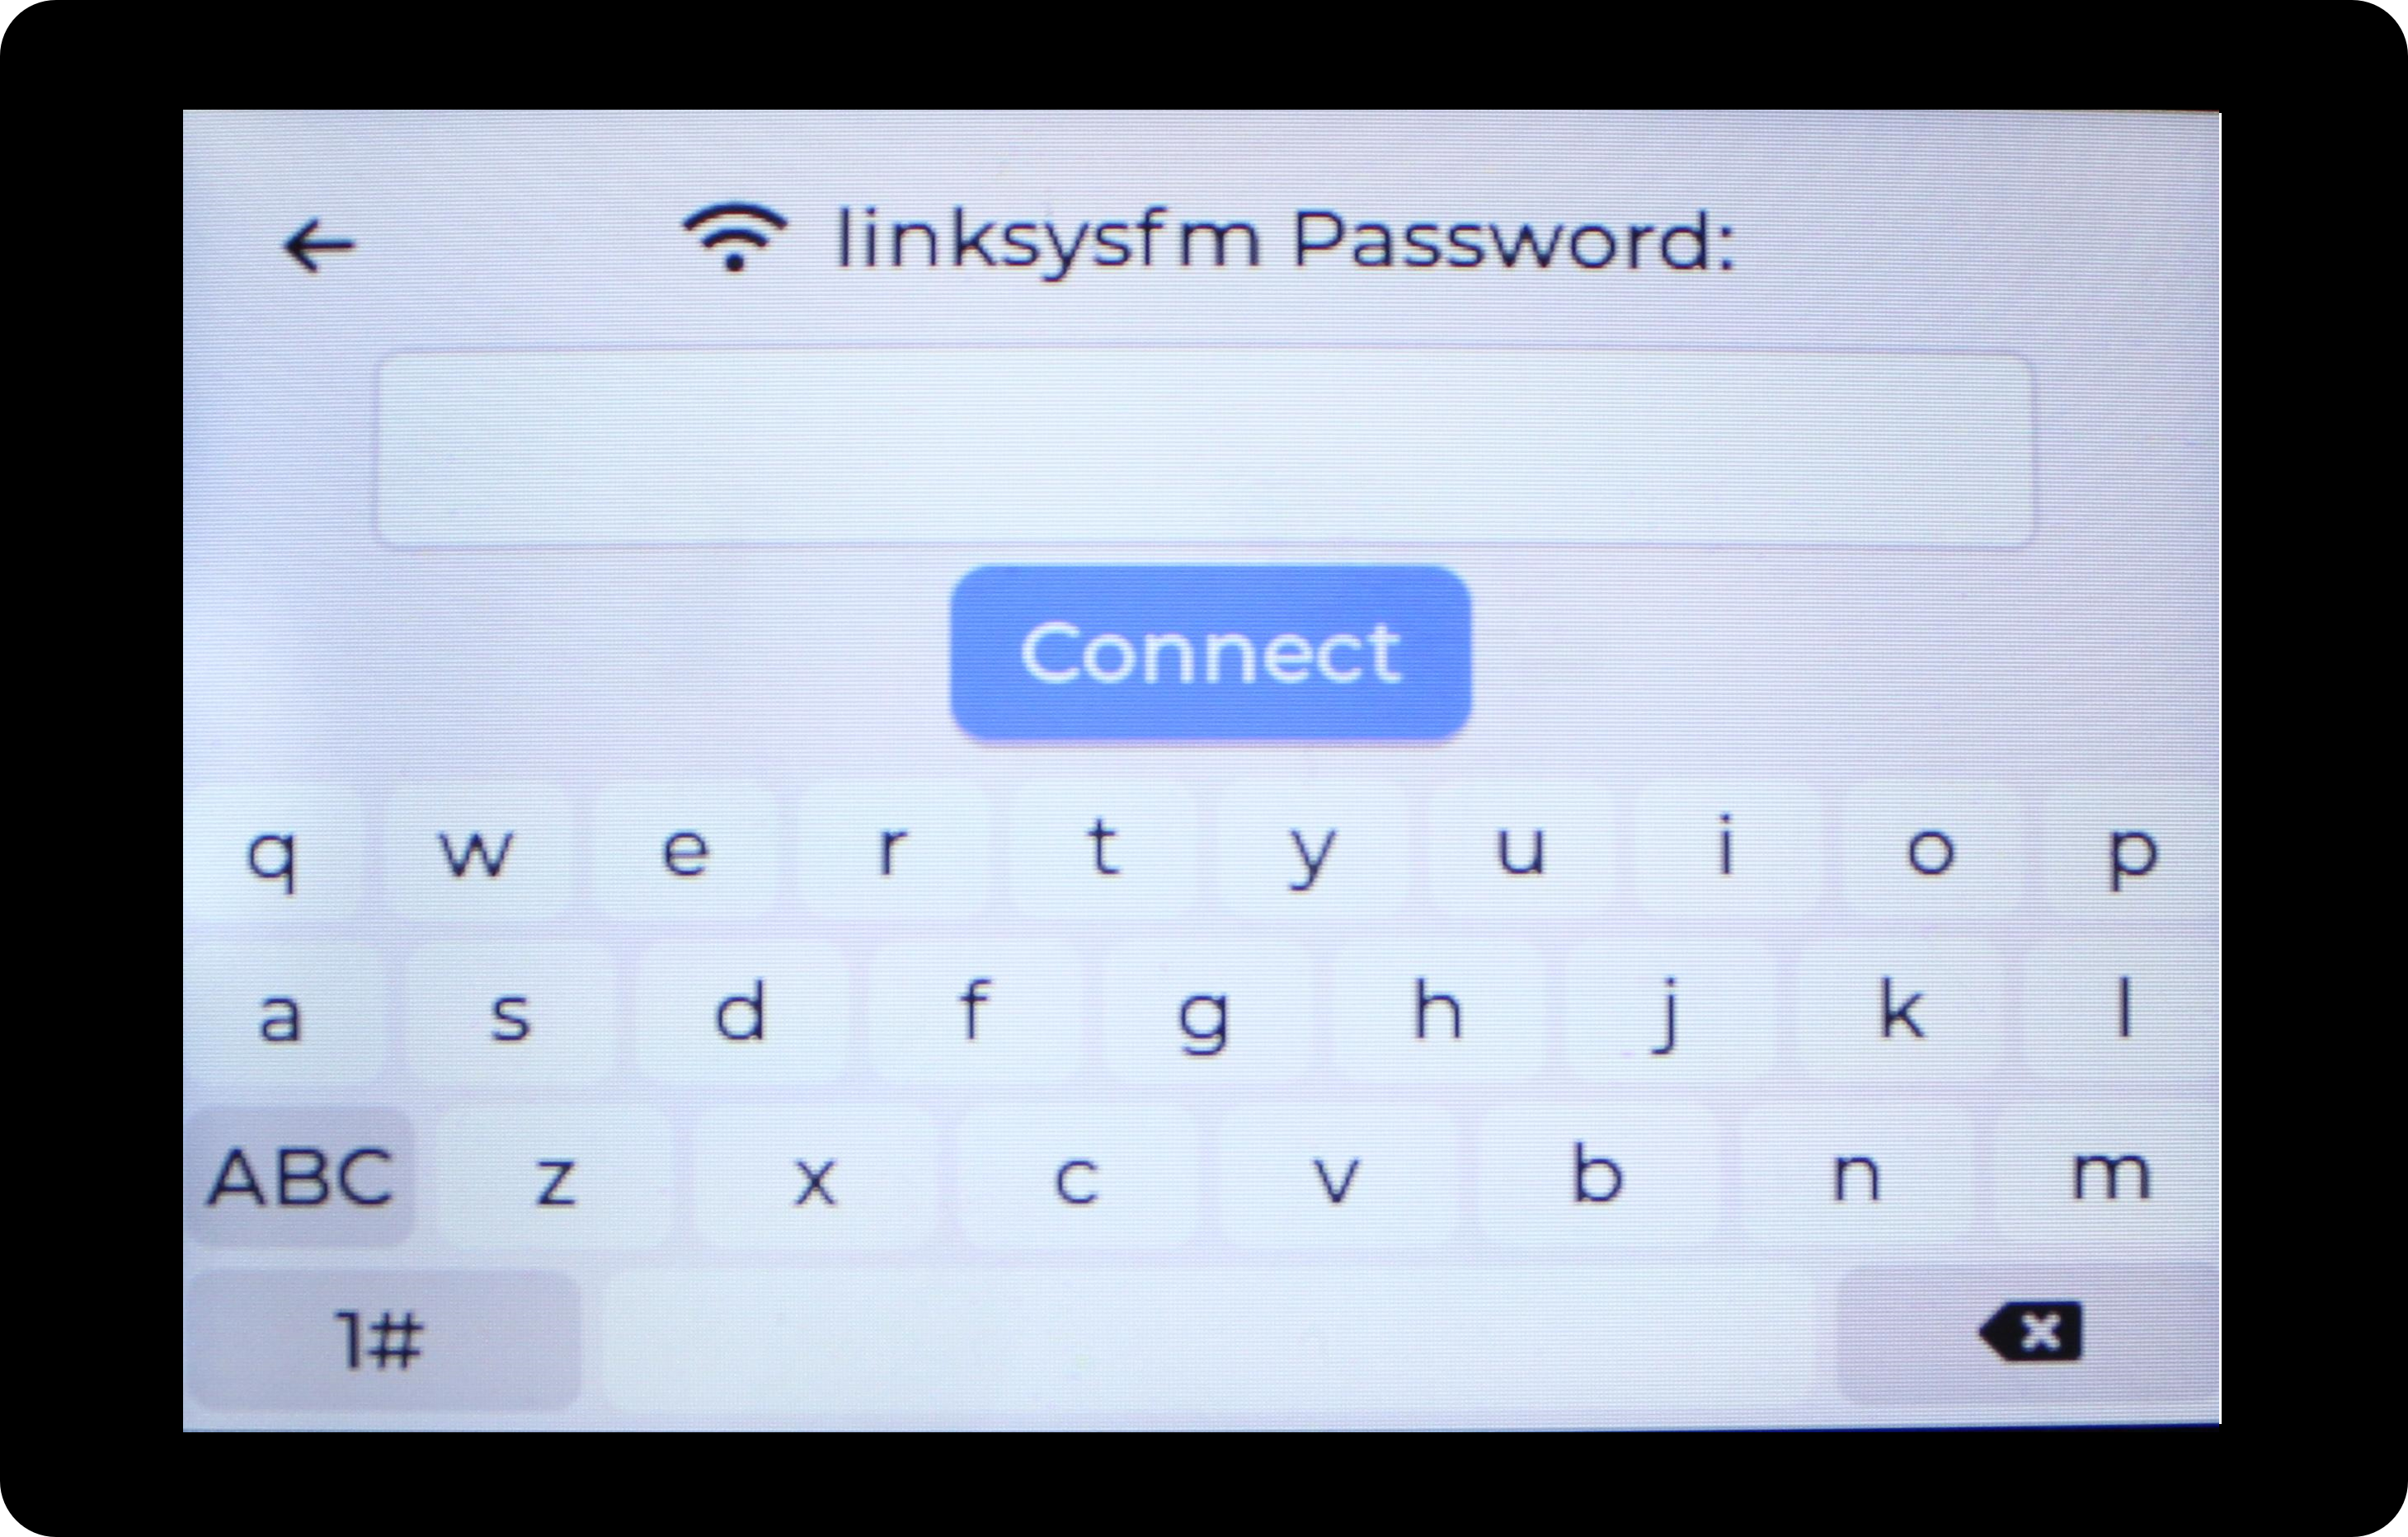
Once this is done, if the entered password is correct, Deskbuddy will connect to your internet.

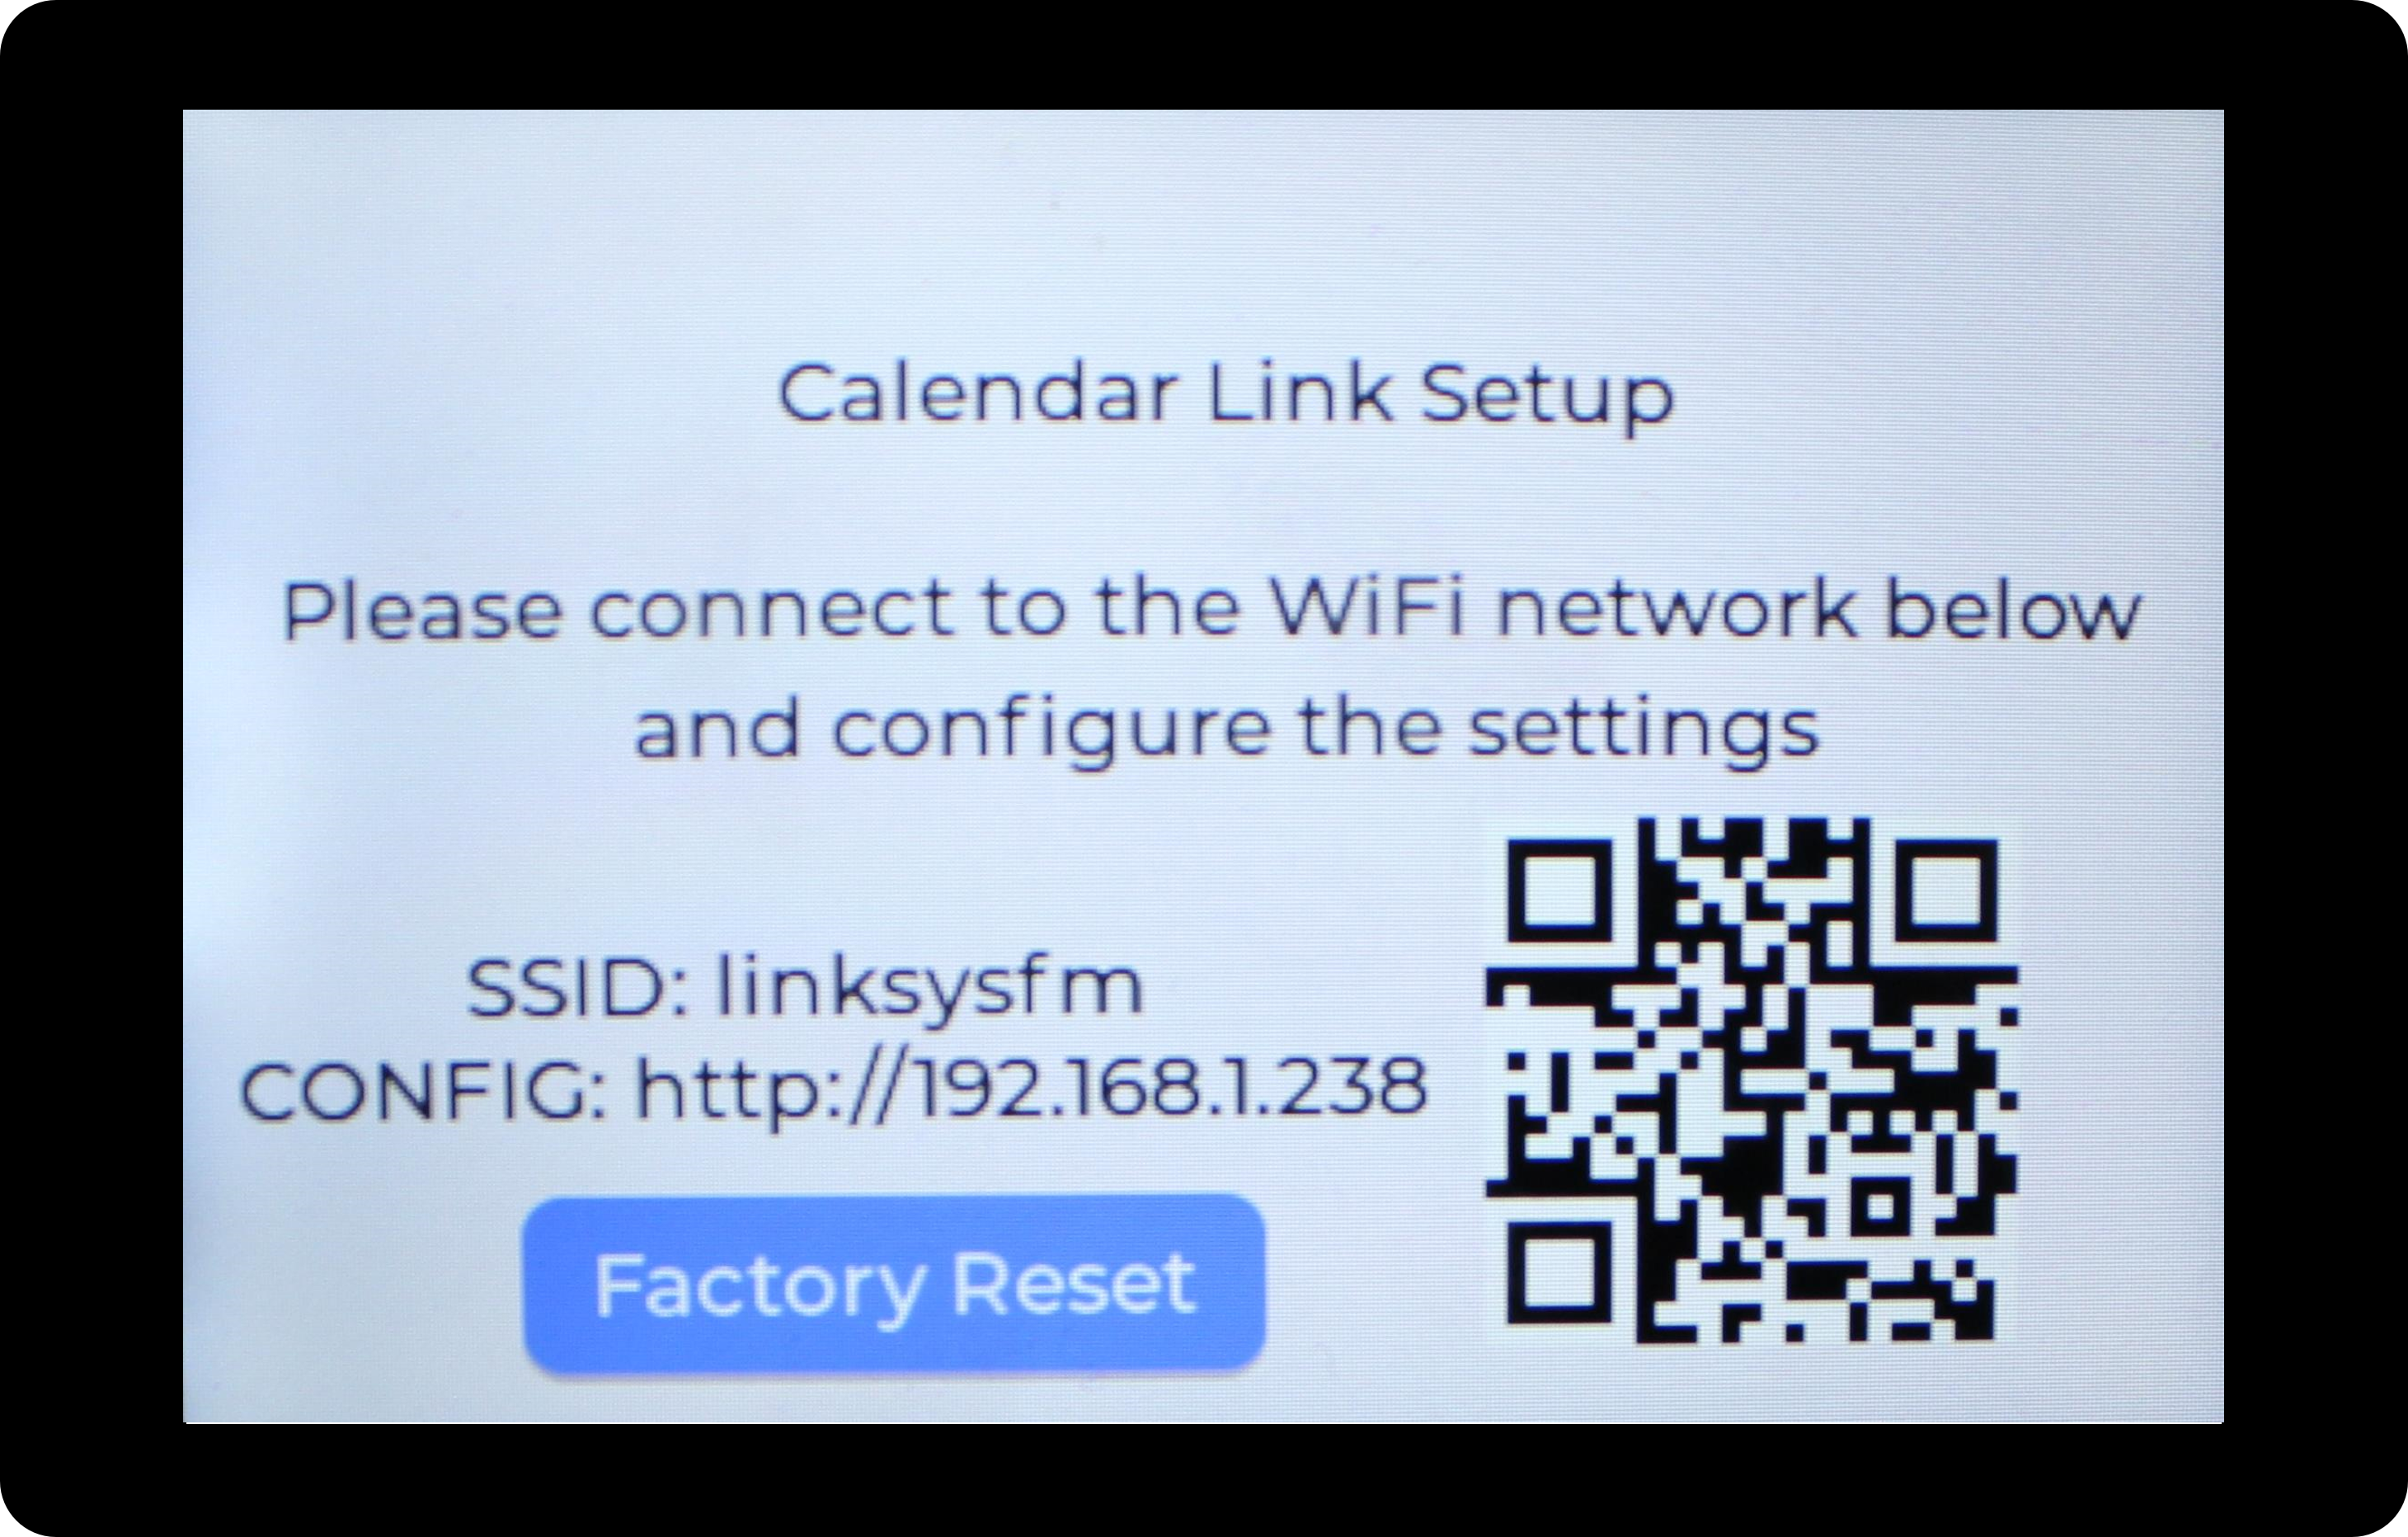
Note: Occasionally, the Wifi connection takes longer than the Deskbuddy is expecting, and so you will see a message saying that it has failed to connect. In this instance, it is advisable to wait a few seconds longer to see if the situation resolves itself. If you get to the Calendar Link Setup screen, then you know it has connected successfully. If you don't get to this screen, then there may be an issue with your WiFi setup or the password details you entered.
Portal Access
The next step is to configure the calendars that Deskbuddy will have access to, which will be done through the Deskbuddy portal. Simply enter the URL address provided by Deskbuddy into your internet browser, or scan the QR code to be redirected to the portal. You will then be asked to enter a PIN, which is also displayed on you Deskbuddy, below the URL.
Once you have loaded the portal, it will look like this:
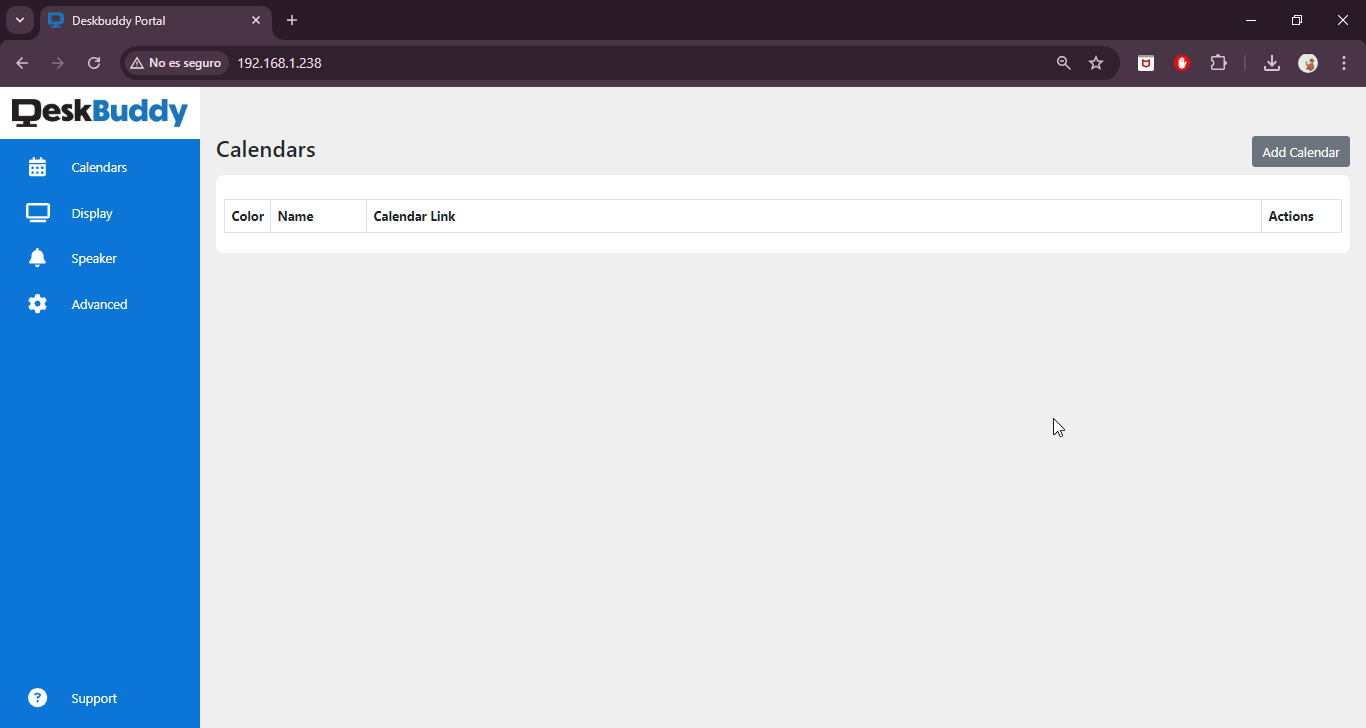
You can use this portal to start adding your calendars. The electronic calendars compatible with Deskbuddy are:
1. Gmail
2. Outlook
3. iCloud Calendar
Gmail Calendar
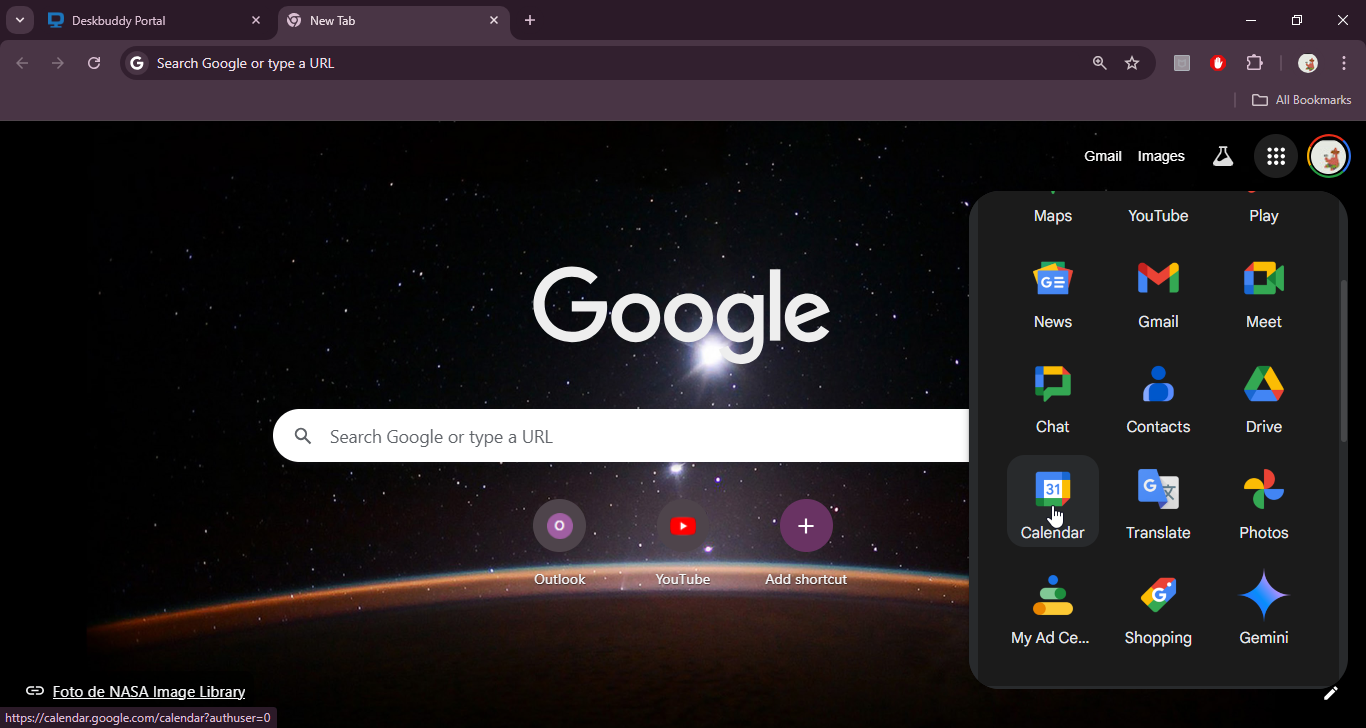
1. Go to the Google Calendar application.
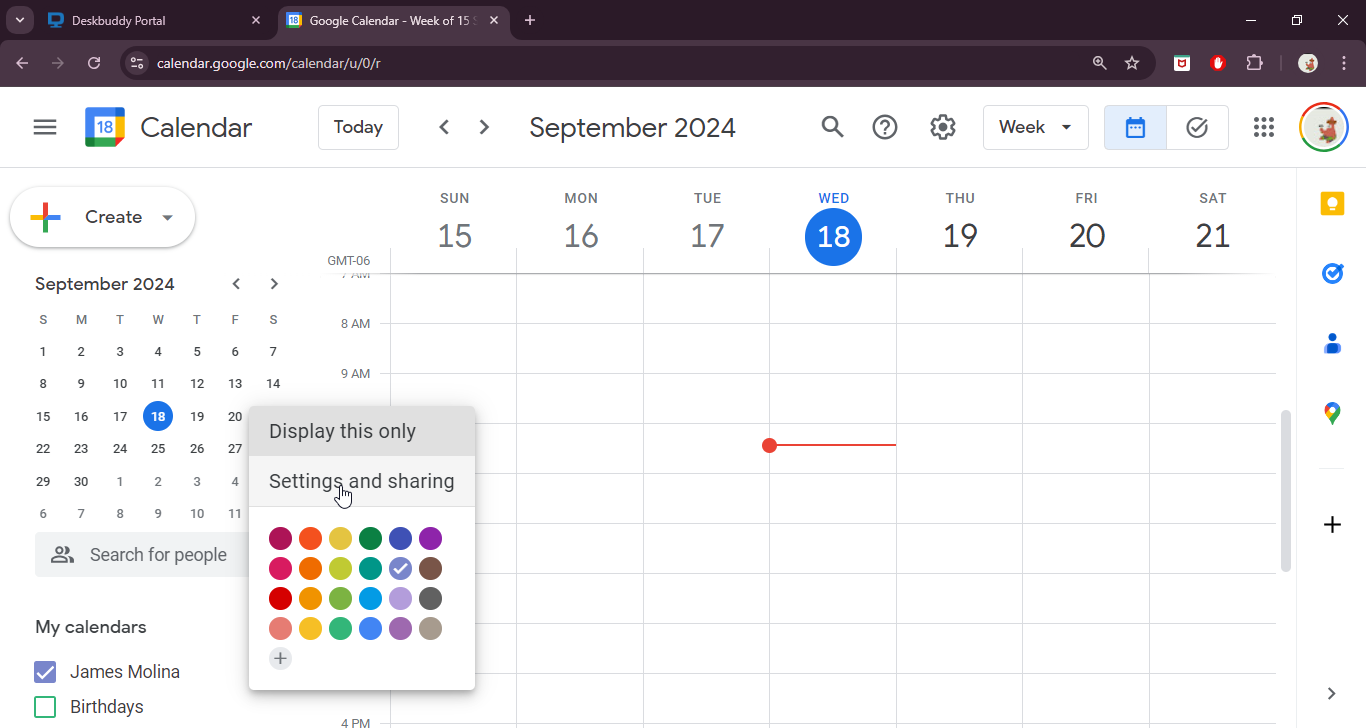
2. Hover over the calendar you want to add to Deskbuddy, click on the three dots that appear, and select Settings and Sharing.
3. On the Calendar settings page (which will be automatically loaded), scroll down to the field labelled Secret address in iCal format and click the copy icon (which looks like two sheets of paper).
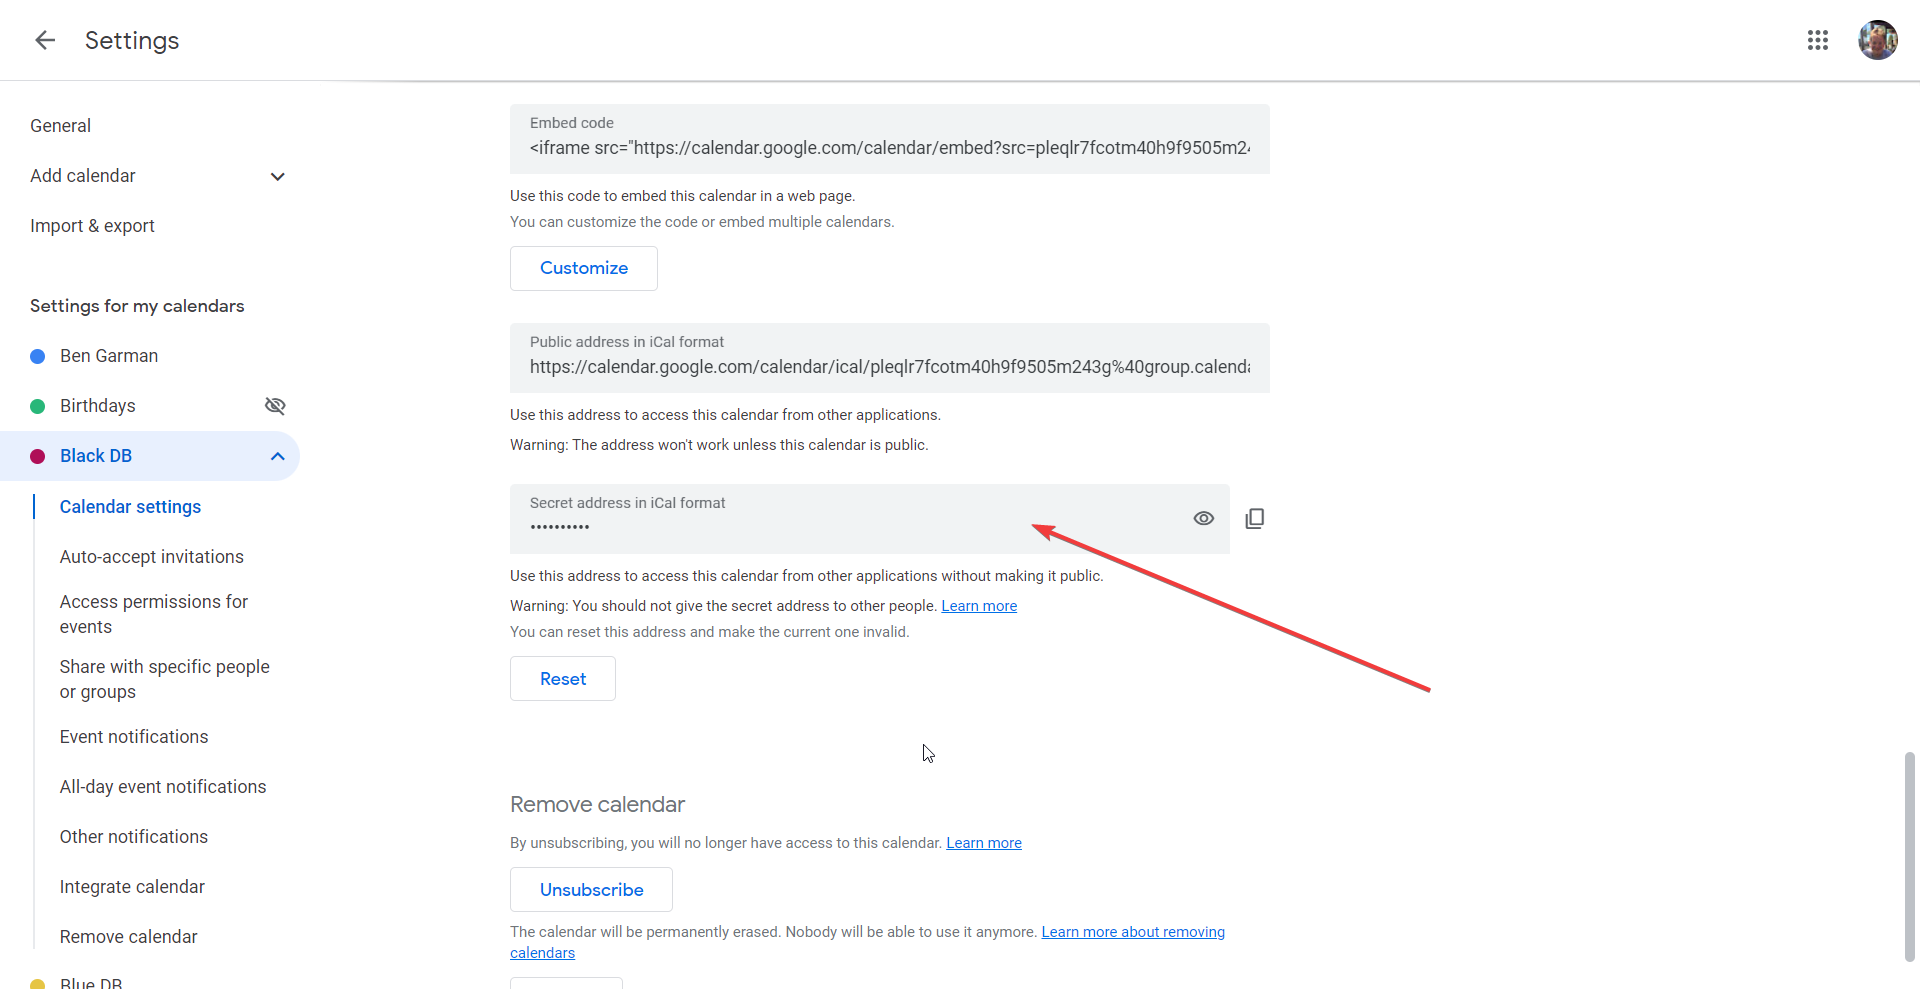 Note: If the Secret address in iCal format field is missing from the Calendar settings page, then you will need to follow the Enabling the Secret iCal URL for G Suite users instructions below.
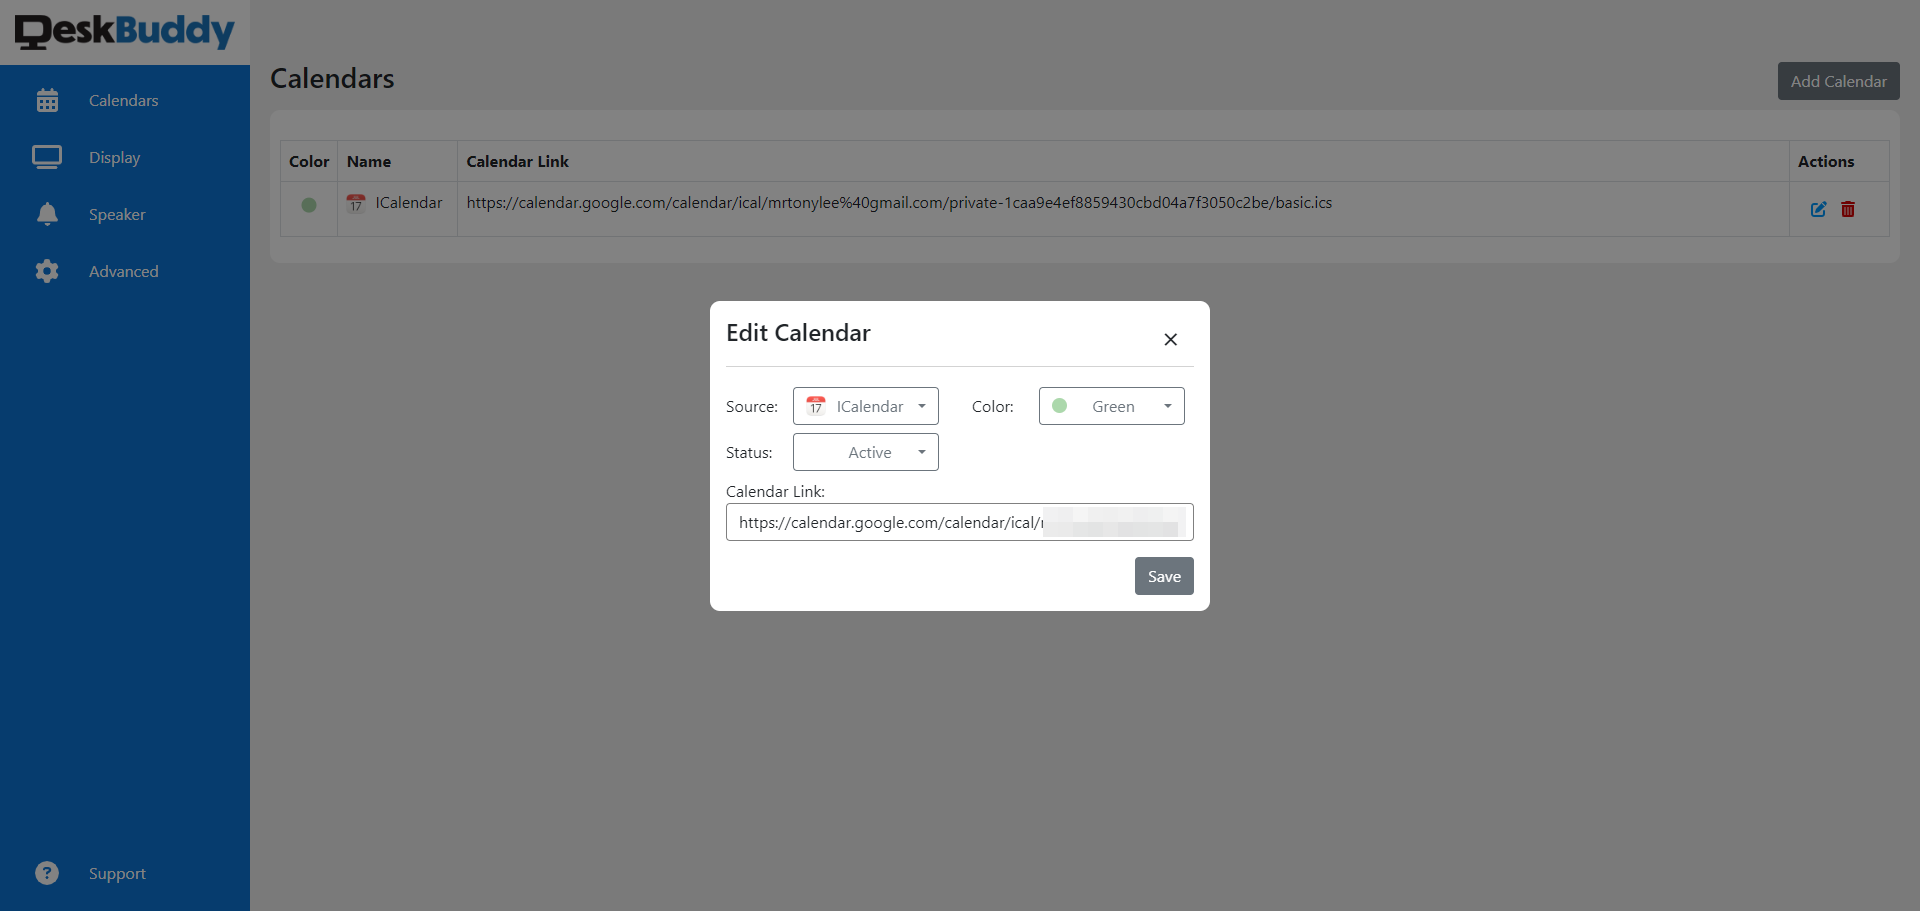
4. Go back to the DeskBuddy Portal and click Add Calendar in the top right hand corner of the screen. In the pop-up that appears, change the Source to iCalendar, select the colour you would like to use to display your calendar, and paste the link copied earlier into the Calendar Link field.
5. Click save and wait for DeskBuddy to connect to your Gmail calendar.
Enabling the Secret iCal URL for G Suite users
If the Secret address in iCal format field is missing from the Calendar settings page, it will be because your G Suite Admin needs to enable this option (it is, by default, disabled.) To do this, they need to:
1. Go to the G Suite Admin Dashboard and log in.
2. Click Apps.
3. Click G Suite.
4. Click Calendar.
5. Click Sharing Settings.
6. Go to External sharing options for primary calendars and select Share all information, but outsiders cannot change calendars.
Outlook Calendar
1. Log into your Outlook email in your internet browser (Edge, Chrome, etc.) and click on the Settings cog icon.
Note: This will not work from within the Outlook desktop application. It has to be done from within your browser.

2. Select Calendar in the left hand menu and then select Shared calendars in the sub-menu that appears.
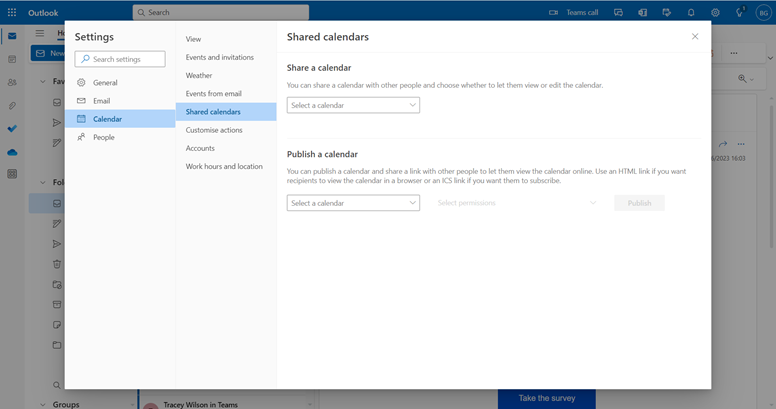
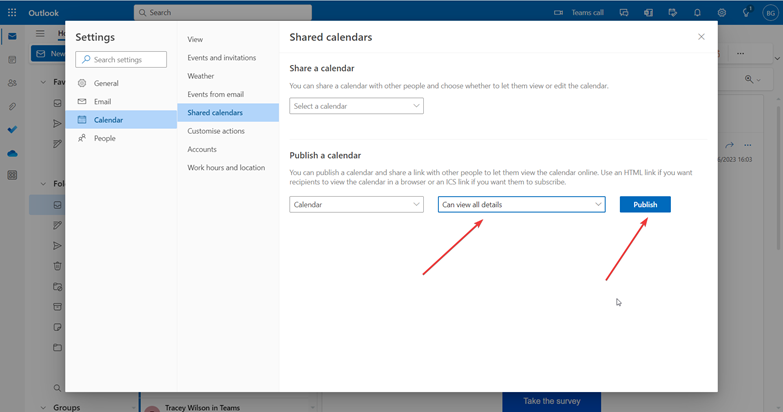
3. Scroll down to the section headed Publish a calendar and click on the Select a calendar dropdown. Choose the calendar you would like to be shown on your Deskbuddy.

4. In the next dropdown, select Can view all details and then click Publish.
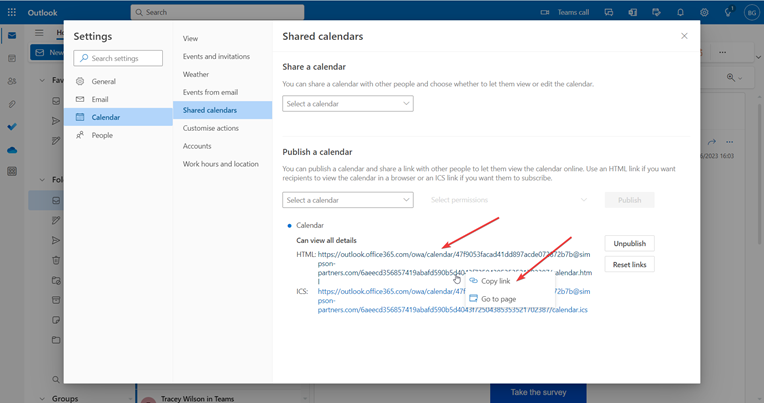
5. Below the dropdowns, two URLs will be diplayed - HTML and ICS. Click on the HTML text and then click Copy link.
6. Go back to the DeskBuddy Portal and click Add Calendar in the top right hand corner of the screen. In the pop-up that appears, change the Source to Outlook, select the colour you would like to use to display your calendar, and paste the link copied earlier into the Calendar Link field.

7. Click save and wait for DeskBuddy to connect to your Outlook calendar.
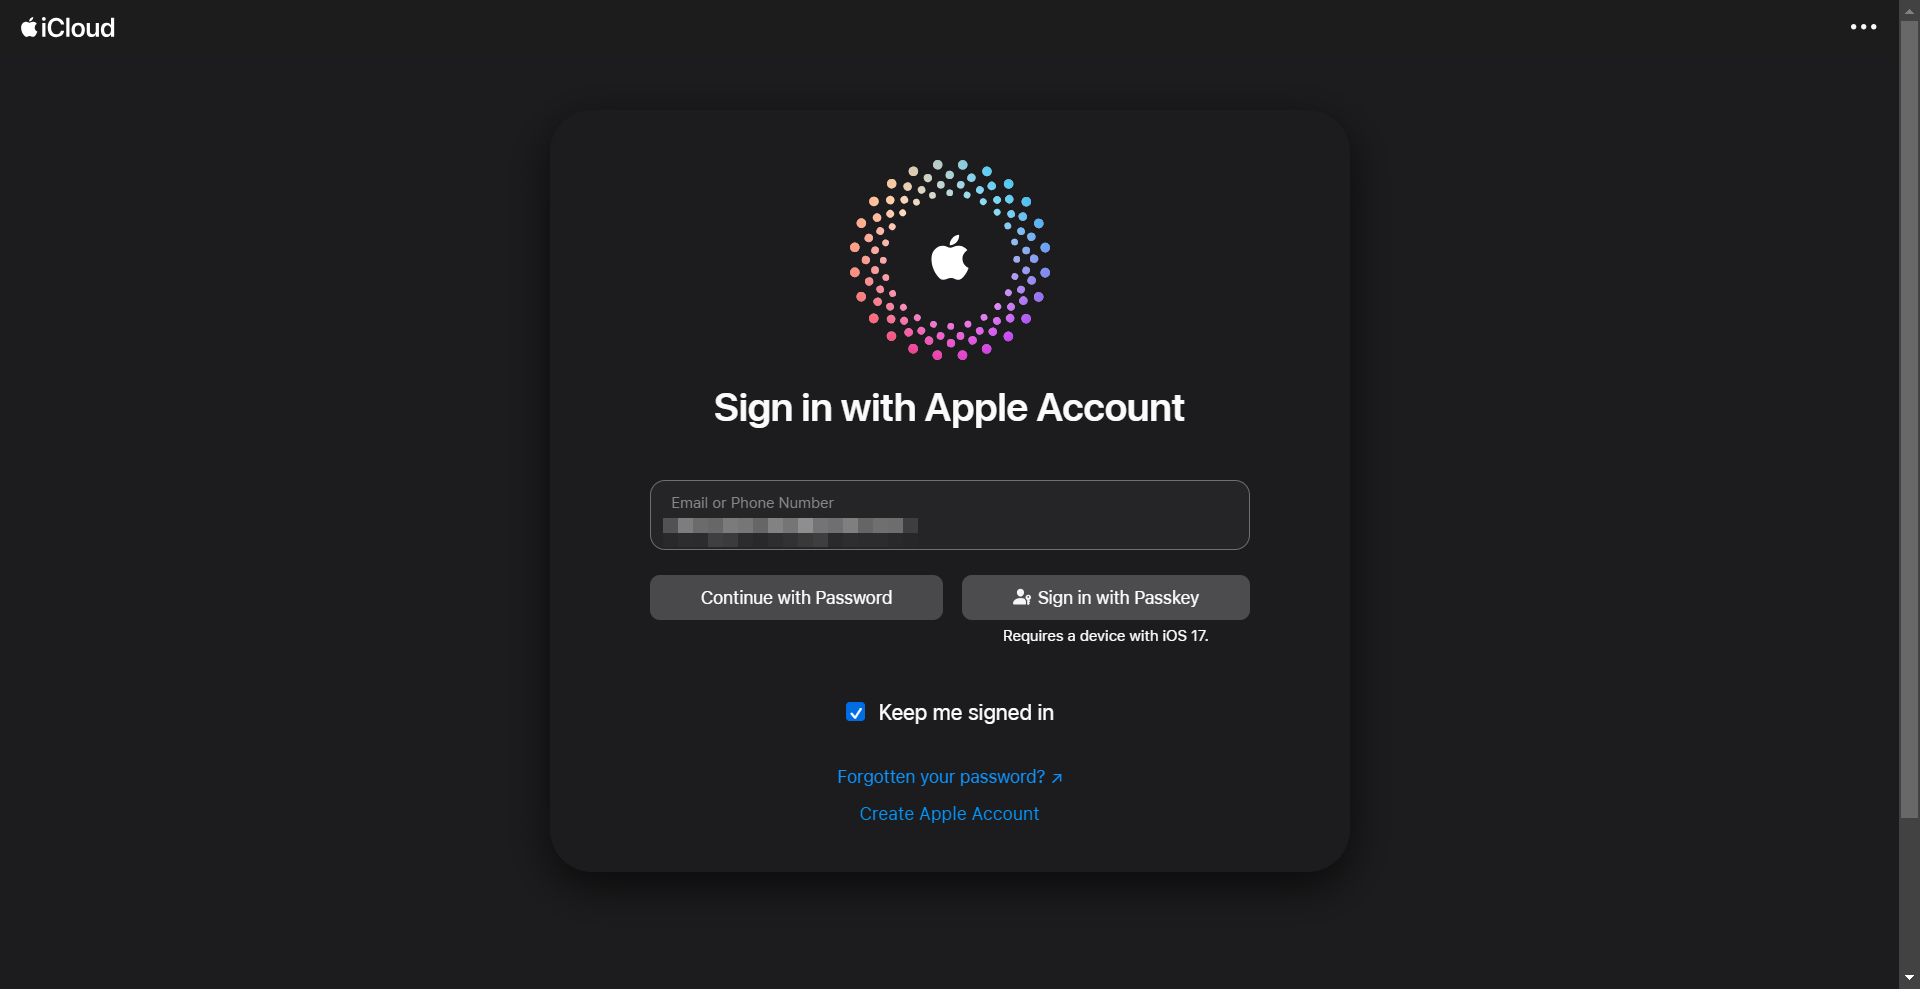
iCloud Calendar
1. Go to iCloud.com.
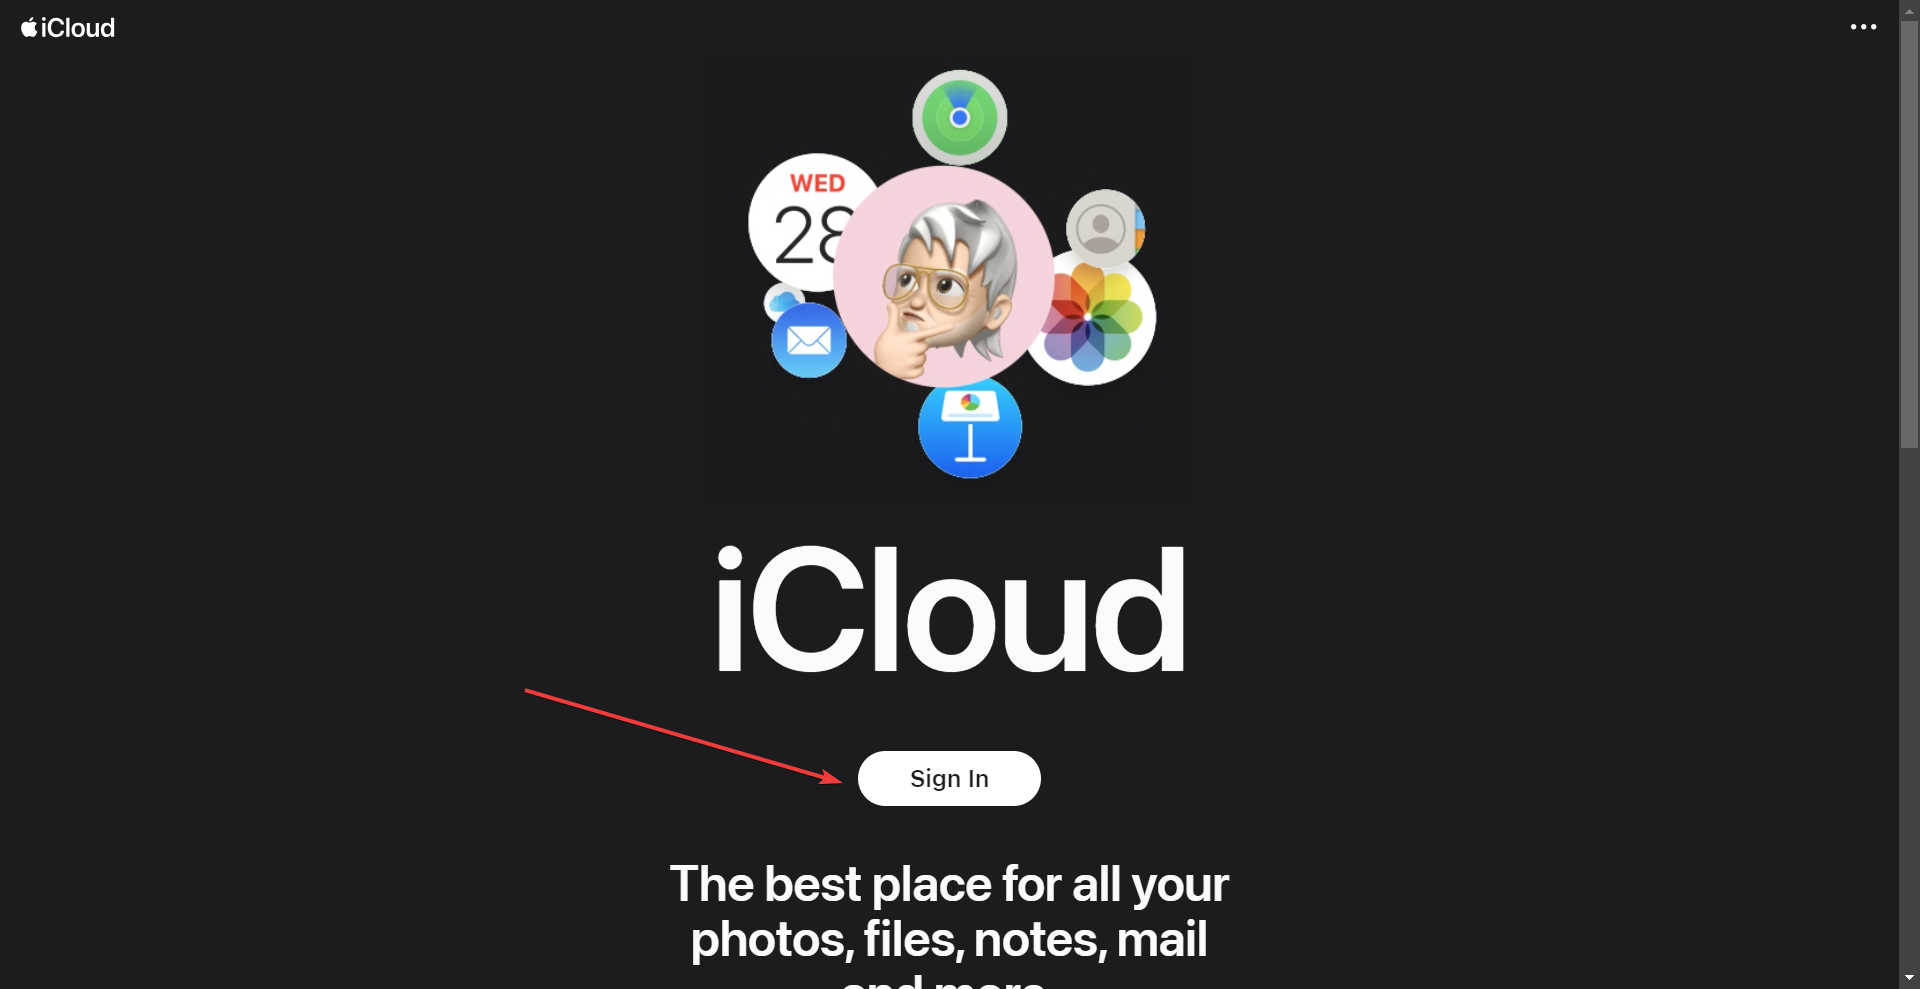
2. Sign into your iCloud account.
3. Once logged in scroll down and select calendar.
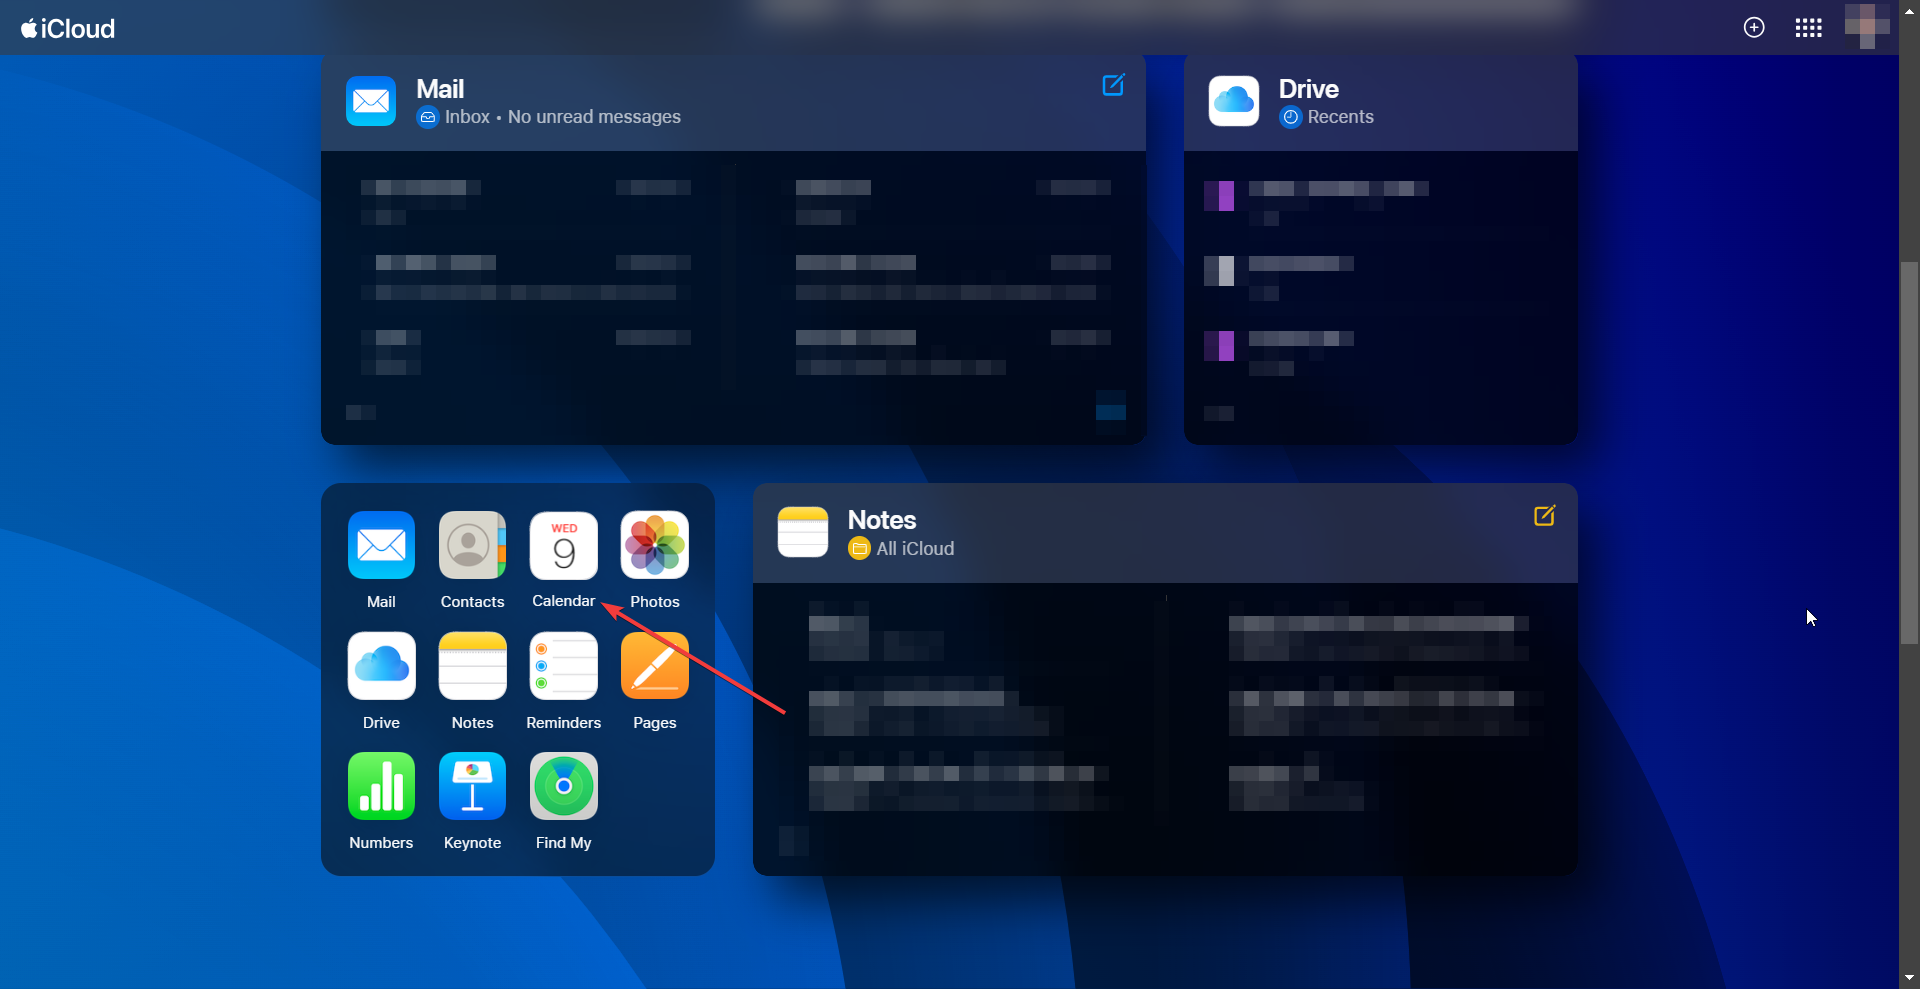
4. Navigate to the calendar you would like to add to your Deskbuddy and click the share icon.
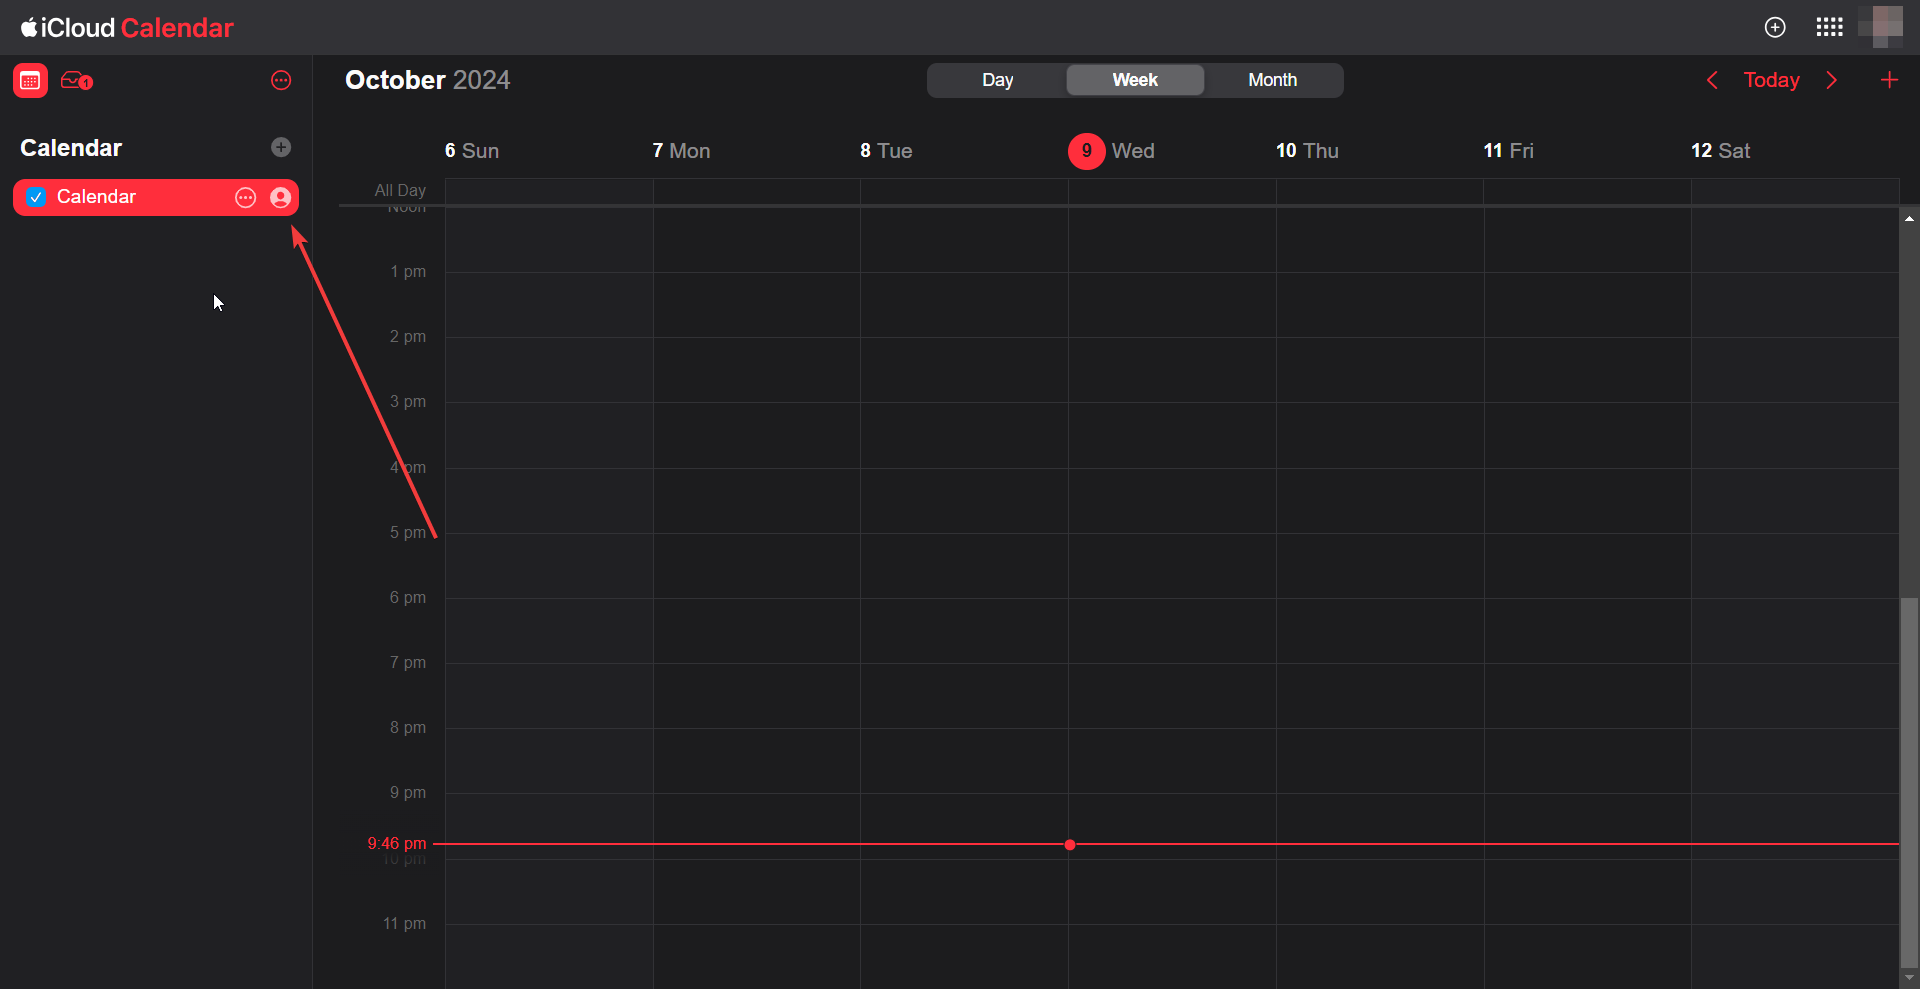
5. Click share publicly and then copy the link that is displayed beneath.

6. Go back to the DeskBuddy Portal and click Add Calendar in the top right hand corner of the screen. In the pop-up that appears, change the Source to iCalendar, select the colour you would like to use to display your calendar, and paste the link copied earlier into the Calendar Link field.
7. Click save and wait for DeskBuddy to connect to your iCloud calendar.